Sunday, February 26, 2012

Chicks

This year, the preschool decided to hatch some chicks using an incubator. A local farmer supplied the class with everything but unfortunately the incubator malfunctioned before the eggs had a chance to hatch. 

My daughter was a little bit confused (along with loads of other questions) and seeing that it was somewhat troubling for her, my husband found a neat toy that hatches in water within 48 hrs. 


She was so delighted and wanted to give one to her friend for his birthday. She also decided to dedicate his birthday card to the little yellow chick and since it was around Valentine's Day, the hearts were a must.


The preschool luckily arranged to bring in more eggs and to try the process again. I'm happy to report that it was a success the second time around and the chicks were born on Valentine's Day!

Meet Cupid and Valentine!

Thursday, February 23, 2012

Pannekoeken

Pannekoek

From Wikipedia, the free encyclopedia

pannenkoek or pannekoek[1] (plural panne(n)koeken) is a Dutch pancake.[2] Pannekoeken are usually larger (up to a foot in diameter) and much thinner than American or Scottish pancakes. They may incorporate slices of baconapplescheese, or raisins.


I felt like pannekoeken a few days ago. My mother in-law has this recipe posted on the refrigerator door and I snapped a photograph knowing that I would one day try it. A (Dutch) friend gave her the recipe and I found some additional information regarding the background of pannekoeken from The Netherlands-American Association of Minesota (NAAM)

They indicate that "the ingredients of the basic pannekoek are incredibly simple. If you are a beginner, just start with the basic recipe and then make adjustments as you go: all purpose flour, milk, egg, salt, butter for frying. Notice there are no amounts. This is a reflection of the flexibility of the recipe. There are two simple rules to making the batter, one requires the use of metric measures and the other ommits measures all together. The amount of flour in grams requires twice as much milk in milliliters. For example, if you use 400 grams flour, you use 2 x 400 = 800 milliliters of milk. The batter when poured from a spoon or ladle, should flow easily. The batter must be liquid, not like water but it should run thin."

This is exactly my mother in-law's recipe and almost verbatim of what she was told when her friend shared the recipe, so very cute and interesting! 

I quickly put the 4 ingredients together, with the omission of salt (personal preference), and had decided on savory pannekoek.


I grated some medium cheddar and sliced up some ham and into the crepe pan they went. The batter was   slightly thicker compared to the crepe cake recipe but that was the only noticeable difference to me.


I served the pannekoeken with maple syrup and it was delicious. 


The raspberry and whip cream pannekoek was served for dessert after dinner. I used frozen raspberries and simmered them in a pot with 1 teaspoon of sugar and 1/8 teaspoon of cinnamon.

In total, I managed to get 3 savory and 2 sweet pannekoeken with the recipe. This double duty pannekoeken gets a double thumbs up!

Sunday, February 19, 2012

Gabrielle's Sloppy Joe Recipe


I decided we were going to have Sloppy Joe's for dinner tonight but I can't say that I've ever eaten a Sloppy Joe before. For whatever reason, I created a super easy supper tonight. I did a search on Google for some recipes and they were all very similar (The Pioneer Woman, Rachael Ray, etc).

Here's my variation of ingredients:

1 pkg ground turkey
1 tablespoon olive oil
1/2 teaspoon garlic powder
1/2 teaspoon paprika
pinch of salt
pinch of pepper

Heat a large skillet over medium heat ground turkey with olive oil. Add seasonings and cook until brown.

Add:
1 small pepper, chopped (red, yellow, green, orange or combination)
1/2 large yellow onion, chopped

Cook until tender.

Add:
1/2 cup ketchup
1 tablespoon barbecue sauce
1 teaspoon mustard
1 teaspoon Worcestershire sauce
1/2 teaspoon cider vinegar
dash of hot sauce
1 cup water

Simmer on medium-low for 10 minutes until thickened.

Prepare:
4 hamburger buns
2 tablespoons butter

Heat another skillet and melt 1 tablespoon of butter and toast 2 buns at a time. Repeat and serve.


My husband kept calling it a "Manwich" so it was clear that the flavor was accurate! This would go wonderfully with plain kettle chips or cucumber if you're feeling particularly healthy!

Tuesday, February 14, 2012

Happy Valentine's Day 2012

A couple of our friends have birthday's this (and next) month so we decided to celebrate both of them this Valentine's Day morning.

My friend saw a bouquet that she thought we could replicate from Martha Stewart's website. We went shopping over the weekend and picked up our supplies. The outer vase is a parfait/trifle/candy dish with Sweethearts candy, and the fresh tulips were placed in a votive candle holder with water. We gave a bouquet to each of the beautiful birthday ladies.


Below, are my Valentine's party appetizers that I contributed for a party over the weekend. Love is certainly in the air! Everywhere I turn!

This was the frozen batch of the three-cheese gougère from a few days ago. They took a lot longer to cook; approximately 30 minutes to bake from frozen. There were about 3 left from a plate of 50+. That's quite a response to a first try. Therefore, you must try!


The butter fudge made its way around the Valentine's circuit once again but this time with hint of coffee - Starbucks VIA coffee to be more precise! I loved the new twist on our classic favorite.


Happy Valentine's Day, 2012! Gabrielle xo

Sunday, February 12, 2012

Heart-Shaped Dreamcatchers

As promised here is the pictorial for our heart-shaped dreamcatcher. After playing around with various starting points, I decided to knot the yarn to the center of the pipe cleaner heart.


From here start weaving around the pipe cleaner in one direction.


After you have woven around the heart, thread the yarn through the outer weaves so it appears like this:


Insert the beads as desired and weave the middle section in any criss-crossed manner ending at the middle of your heart and knot to secure.


My son had creative freedom to thread them as he pleased so each heart is unique. I managed to pick up a bag of colored feathers last week. I attached one (or two) to each of the finished dream catcher.

Thursday, February 9, 2012

The Real Mushroom Soup With Gougères

I have a Valentine's Day function to attend on Saturday night and the host has requested an appetizer from each guest. I will also be having high tea with another friend earlier in the day so that doesn't leave me with much time for preparation.

One of my friends on Facebook shared her fondness of gougères so I started to research some recipes. I've never made choux pastry before but that doesn't discourage me. AND the best part is that I can freeze gougères ahead of time. I'll just pop them into the oven before I leave on Saturday night. I found what I think is the perfect "Gougères" recipe from epicurious.com.

Well, it's a good thing that I baked up a couple gougères for lunch today. They were beautifully puffed after baking for 12 minutes.


Unfortunately, they sunk before I could even photograph them. I quickly took a bite and they were still raw in the middle so I placed them back into the oven for an additional 4 minutes. 


This time I had the common sense of touching them to make sure they were firm. All I could think was that I was lucky this was my test batch and that they came back to life.

I had the intention of serving the gougères with "The Real Mushroom Soup" by Jamie Oliver for lunch today. I placed the gougères back in the oven (to keep them warm) and started the soup.


Mushrooms are of course the star of the meal and I only had white button mushrooms on hand. I've made this recipe a few times before so I know it will still be good.


I usually like to saute everything a little bit longer but everyone was hungry so I had to make a few revisions.


I simmered the soup for about 15 minutes and skipped pureeing half of the soup.


I immediately added two heaping teaspoons of mascarpone. I then dished the soup out into the bowl, gave it a squeeze lemon juice, added three gougères on top, and served.


This is today's lunch and post in a hurry. I've linked the recipes if you'd like to try it out for yourself. I'll let you know how the gougères turn out on Saturday!

Monday, February 6, 2012

Croissant French Toast With Soft Caramel Apples

I treat myself to high tea every now and again but on this special day, I invited a couple moms and friends to join us for brunch and play date. I decided to serve my guests with "Croissant French Toast With Soft Caramel Apples," which is a similar item that I have ordered from the Secret Garden Tea Company's "Breakfast In The Garden" menu.


Caramel is uncharted territory for me so I wanted to capture the process every step of the way. 


The sugar started to melt and I was excited at this point!


The sugar looked beautifully carmelized to me so I immediately added the butter.


I think I cut the apples thinner than what the recipe calls but I intended on cutting them thinner anyway.


My caramel seized after I added the apples and I was almost in a panic.


In the midst of what was going on in the pot, I failed to realize that I hadn't folded in all of my apples. I quickly added 2 more sliced apples with 5 minutes left.


The batter for the French toast was ready to go.


I sliced my "Costco Bakery Croissants" and they were dredged and laid on the sizzling hot pan.


Again, the nerves started to set in while I anxiously waited to flip the croissants to the other side.


Ah, success. It was smooth sailing from here...


Now isn't this a beautiful sight? Breakfast fit for a queen (a few queens)!


The recipe for "Croissant French Toast With Soft Caramel Apples" is courtesy of Tyler Florence from FoodNetwork.com.

Ingredients:
  • 3 large eggs
  • 1/4 cup milk
  • 1/2 teaspoon pure vanilla extract
  • Pinch ground cinnamon

Caramel Apples:

  • 1/2 cup sugar
  • 3 tablespoons unsalted butter
  • 6 Granny Smith apples, peeled, cored and cut in 1/2-inch-thick wedges
  • 1/2 cup pure maple syrup
  • 3 tablespoons unsalted butter
  • 4 large croissants, halved lengthwise
  • Confectioners' sugar, for dusting
  • Ground cinnamon, for dusting

Directions

Make the batter for the French toast by whisking together the eggs, milk, vanilla, and cinnamon until evenly blended. Cover and refrigerate.
Pay close attention while you make the caramel apples - put the sugar in a large dry skillet and place it over medium-low heat. Stir constantly with a wooden spoon until the sugar melts and begins to carmelize, about 5 minutes. Be careful; the sugar is really hot at this point. Still stirring, add the butter, which will foam a little. Once the sugar and butter become a caramel sauce, fold in the apple wedges. Now, because the apples are cooler than the sugar, the sugar may start to seize and harden, but don't freak out -- keep stirring, once the apples warm up the caramel will smooth out again. When the caramel sauce starts to form around the apples, pour in the maple syrup. Give it a stir and simmer for about 10 minutes until the apples are fork tender. Pull them off the heat and keep warm until you are ready to serve.
For the French toast itself, warm the butter in a large non-stick skillet over medium-low heat. You probably will only be able to fit a couple of croissants in the pan at once, so prepare these in batches. Take a croissant half and quickly dredge it in the batter. The key word here is quickly; the croissants are very soft and will disintegrate if soaked in the batter. Lay the croissants in the pan, cut-side down, and cook for 4 to 5 minutes. Carefully flip them over with a spatula and brown the other side.
The presentation is like a caramel apple sandwich - take the bottom half of the croissant and put it on a plate, spoon some of the caramel apples on top of that, and cover with the top 1/2 of the croissant. Dust with confectioners' sugar and cinnamon and serve.

Sunday, February 5, 2012

Gabrielle's Parmesan Kale Chips

A friend mentioned kale chips to me a few weeks ago and we all agreed that we need a healthier alternative to our potato chip addiction. Then, I saw Lou Diamond Phillips use it as a side dish for one of his meals on the Food Network's show "Rachael vs Guy Celebrity Cook-Off."


Since all I seem to be hearing is kale chips, it's time to bake one of my favorite leafy greens. The verdict? I think I can get addicted to these crispy, cheesy, greens!

Here's my very own recipe and directions:

1 bunch of kale
1-2 tablespoon olive oil
1 tablespoon Parmesan cheese

1. Thoroughly rinse the kale. Tear into bite size pieces and remove stem. Place in salad spinner to dry and pat with paper towel.

2. Toss with 1-2 tablespoons of olive oil (enough oil to coat each kale leaf) and place on a baking sheet.

3. Bake in oven at 325F for 10 minutes. Check periodically until crisp.

4. Remove from oven and toss with 1 tablespoon of fresh, finely grated Parmesan cheese. Serve and enjoy.

Nanaimo Bars

I was never into Nanaimo bars. I was reintroduced to them by a Starbucks barista who recommended that I try it. According to her, it was the best... and it certainly was! Unfortunately, these specific Nanaimo bars are only sold at Starbucks during the holidays. Of course, I want one during the month February. Since I have been on a bit of cooking frenzy these days, why not make a batch of the ever so chocolaty bars myself?!

The recipe can be found from the city of origin Nanaimo, BC.


I preceded to follow the directions as closely as possible. But, when I added the beaten egg to the double boiler, the mixture started to separate and I was afraid that the egg would curdle so, I removed the mixture from the heat and whisked until thick. I placed it back on the double boiler after it thickened to keep the mixture warm.


I didn't want overly large coconut shavings in the bottom layer so I gave them a few pulses in the food processor since I had already used it for my frozen homemade graham crackers from last week.


This is how the completed bottom layer looked after pressing firmly into an 8X8 pan.


The second layer was straight forward. I decided to add 1/2 teaspoon of vanilla extract because I LOVE my vanilla.


Custard powder is crucial to this layer and I've never used it before. I have no clue what I'll be doing with an entire tin of this stuff - I foresee a lot of Nanaimo bars in my future.


I dolloped the second layer onto the bottom layer.


So far, so good.


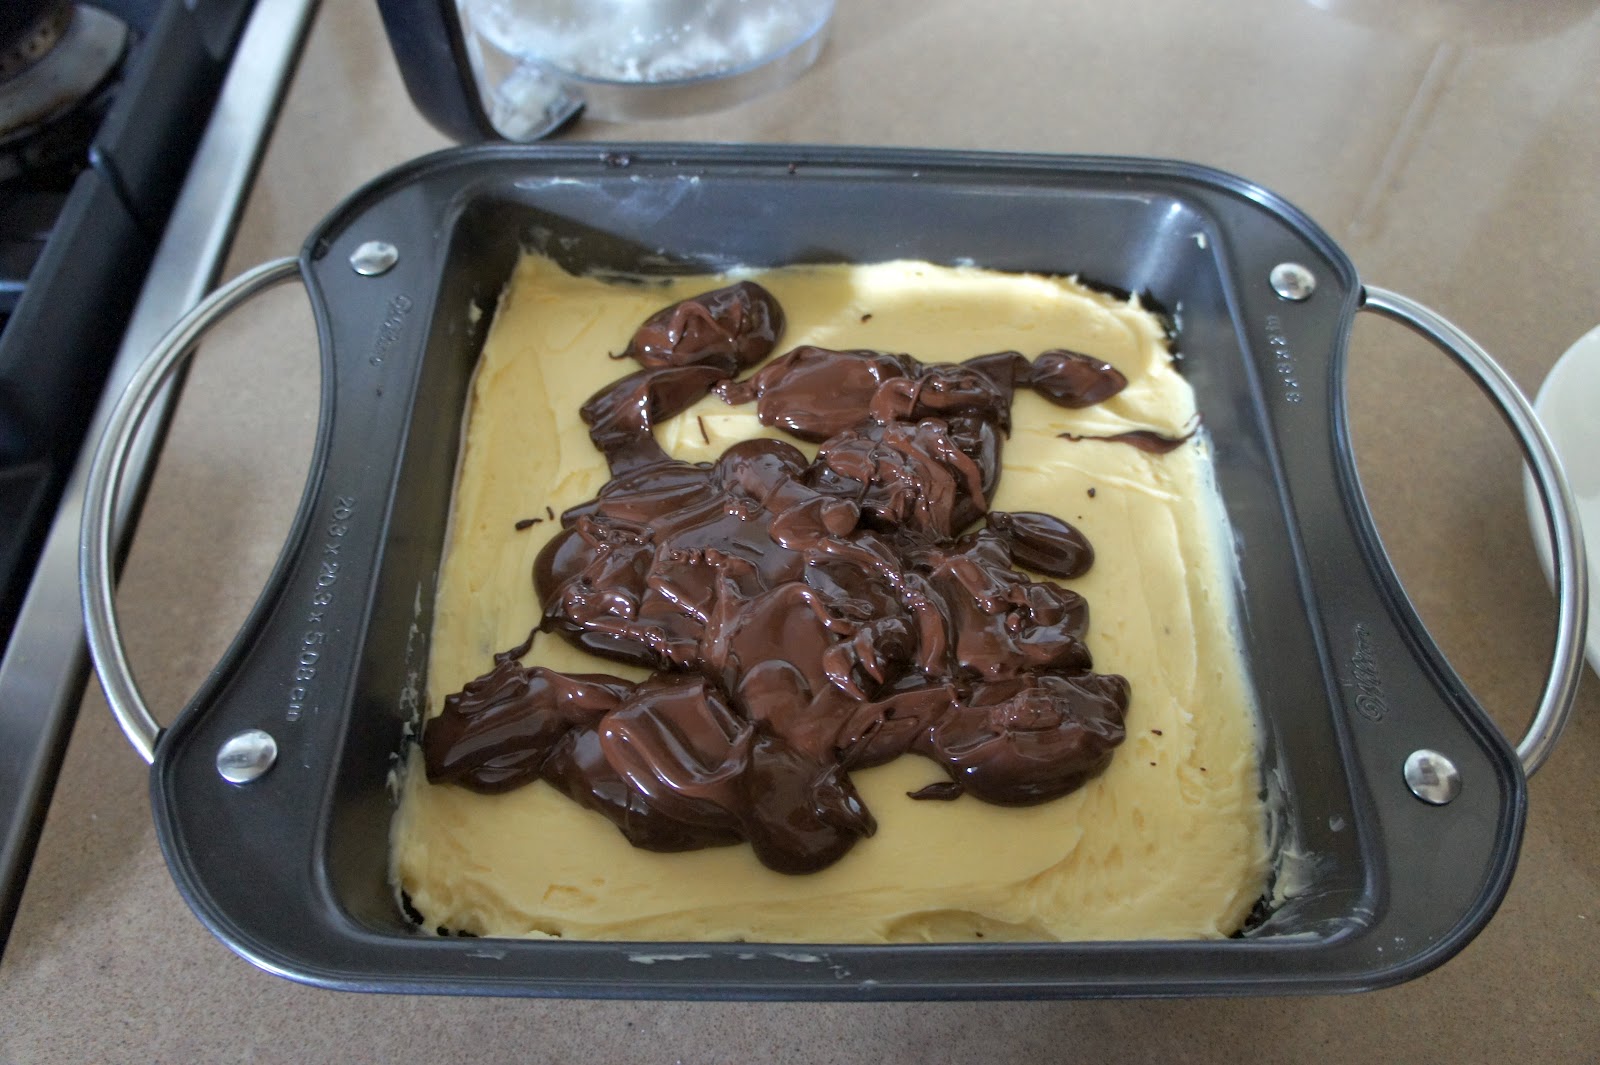
I weight my semi-sweet chocolate chips and it didn't look like it was going to be enough so I added an additional 2 oz.


The third layer still looked rather thin to me. Oh well, time to chill in the refrigerator.


My son had a birthday to attend in the afternoon. I chilled the bar for about an hour and sliced a good portion and placed it on a cake board. I had made this with my mother-in-law's birthday in mind and planned on serving it for dessert after dinner (last night). I saw a gorgeous backdrop while out and couldn't resist a photograph. 


We arrived for dinner at Tomahawk Restaurant where we saw an episode of the Food Network Canada's show "You Gotta Eat Here." I just had to dine here after seeing their signature "bacon-mushroom-cheeseburger." I decided to photograph the bar once again in front of the now famous; iconic restaurant.


My sister-in-law (who's not overly big on dessert) devoured it. I told her that was the biggest compliment yet. I was so thrilled.

This is the recipe found on www.nanaimo.ca.
Nanaimo Bar recipe by Joyce Hardcastle 
Bottom Layer 
½ cup unsalted butter (European style cultured)
¼ cup sugar
5 tbsp. cocoa
1 egg beaten
1 ¼ cups graham wafer crumbs
½ c. finely chopped almonds
1 cup coconut
Melt first 3 ingredients in top of double boiler. Add egg and stir to cook and thicken. Remove from heat. Stir in crumbs, coconut, and nuts. Press firmly into an ungreased 8" x 8" pan.
Second Layer½ cup unsalted butter
2 Tbsp. and 2 Tsp. cream
2 Tbsp. vanilla custard powder
2 cups icing sugar
Cream butter, cream, custard powder, and icing sugar together well. Beat until light. Spread over bottom layer.
Third Layer 
4 squares semi-sweet chocolate (1 oz. each)
2 Tbsp. unsalted butter
Melt chocolate and butter over low heat. Cool. Once cool, but still liquid, pour over second layer and chill in refrigerator.

Thursday, February 2, 2012

Williams-Sonoma Buttermilk Waffles

My mother-in-law gave us a Wolfgang Puck Waffle Maker a couple of years ago and I'm almost embarrassed to say that this is my third time using it. I've used pancake mixes previous to this but after making them myself, I have been converted.

Williams-Sonoma has created an easy, straight forward recipe and I wish I made the jam. I served these baby's with fresh strawberries and whipping cream. We had plenty left over so I refrigerated them and popped them back in the toaster the following morning, and they were still absolutely perfect!


This Williams-Sonoma.com recipe is a keeper.

"A simple French-style jam made with fresh strawberries and infused with vanilla bean is the perfect accompaniment to our buttermilk waffles."

Ingredients:

For the strawberry jam:

  • 2 lb. strawberries, stemmed and quartered
  • 1 cup sugar
  • 1 vanilla bean
  • 2 tsp. fresh lemon juice

For the waffles:

  • 3 eggs, separated
  • 1 1/2 cups buttermilk
  • 8 Tbs. (1 stick) unsalted butter, melted
  • 1/2 tsp. vanilla extract
  • 1 1/2 cups all-purpose flour
  • 1 1/2 tsp. baking powder
  • 1 tsp. baking soda
  • 1/4 tsp. salt
  • 3 Tbs. sugar
  • Sweetened whipped cream for serving

Directions:

To make the strawberry jam, in a large bowl, combine the strawberries and sugar and stir until evenly coated. Transfer to a 9 1/2-inch copper fry pan. Using the tip of a knife, split the vanilla bean in half lengthwise to expose the seeds and scrape the seeds into the strawberry mixture. Add the pieces of the pod to the pan. Set over medium heat and cook, stirring occasionally, until the strawberries have broken down, most of the liquid has evaporated and the mixture resembles a thick jam, 45 to 48 minutes. Remove from the heat, discard the vanilla bean pod and stir in the lemon juice. Let cool until just warm.


Meanwhile, make the waffles: Have all the ingredients at room temperature. Preheat an oven to 200°F. Preheat a Belgian waffle maker according to the manufacturer?s instructions


In a large bowl, whisk the egg yolks. Whisk in the buttermilk, butter and vanilla. Over a sheet of waxed paper, sift together the flour, baking powder, baking soda, salt and sugar. Add the flour mixture to the yolk mixture and whisk until smooth.


In another bowl, whisk the egg whites until stiff peaks form. Using a rubber spatula, fold half of the egg whites into the batter, then fold in the remaining whites. Cook the waffles according to the manufacturer?s instructions. Transfer to a baking sheet and keep warm in the oven.

Serve the waffles with the strawberry jam and whipped cream alongside. Makes about eight 4 1/2-inch waffles and 2 cups jam.  

Wednesday, February 1, 2012

Valentine's Day Butter Fudge

I thought to share last year's confectionery that my children handed out to the class for Valentine's Day. We had so much fun packaging this sweet, buttery, luscious, melt-in-your-mouth... fudge!


I found this great recipe and loved the fact that it's made with butter. I decided to list the ingredients as well because we live in an allergy aware society (and my son just happens to be one of them).

I found this recipe on Canadian House & Home and went with the miniature marshmallows option. 

"This mouthwatering holiday fudge, with bits of Score or marshmallows, comes from House & Home style editor Michael Penney's sister-in-law, Allison Woodley."
Ingredients: 
1/2 cup butter
1/2 cup sugar
1/2 cup packed brown sugar
1/2 cup heavy whipping cream
Salt to taste
1 tsp vanilla
2 cups confectioners sugar
1 cup Hershey's Score bits or 2 cups miniature marshmallows
Instructions:
Step 1: In a large, heavy saucepan, combine the butter, sugars, cream and salt. Bring to a boil at medium heat, stirring occasionally. Boil for 5 minutes, stirring constantly.
Step 2: Remove from heat; stir in vanilla. Stir in confectioners sugar until blended. Fold in Score bits or marshmallows.
Step 3: Spread into a buttered 8" square dish (Allison uses a rectangular glass dish lined with waxed paper.) Cover and cool in fridge.
Step 4: Cut into 1" squares. Store fudge in an airtight container in the refrigerator.